Hestia Control Panel – Host Websites, Email, DNS, Nextcloud, Wordpress and More
Thinking about running your own web server? You might be considering Microsoft IIS, or a Linux option, and with that said, I’ve been using IIS for years, and decided to make the switch on my personal systems when I saw the Hestia Control Panel.
The Hestia Control Panel runs on Linux, and is an easy to use front end with a web interface to manage your websites, DNS, email server, Nextcloud and other applications.
Hestia Control Panel is simple to install and configure, and can be installed on Debian 10/11, or Ubuntu server 18.04 LTS, 20.04 LTS, or 22.04 LTS.
I switch to Hestia Control Panel because I needed a simple option to deploy multiple websites, several email servers, and a Nextcloud environment or two when needed. Hestia Control Panel makes it simple to setup all those things right from the web interface. I have installed it on two different systems, one being a virtual machine with 4 CPU cores, and 2GB of RAM, and the second on a cloud environment with 1 CPU, and 1GB of RAM. It goes without saying, however if you want to run several things from the server, then you may need more system resources, but for my needs it’s been running well for me with the above specs. For example, on the system with 1 CPU and 1GB RAM, I’m running Ubuntu Server 22.04 LTS, and Hestia Control Panel, and I use Hestia to setup 3 websites with different domains, and subdomains, and use it to run two email server for two of those domains, as well as a Nextcloud environment for one of the domains.
In my setup, I host family and friends websites, and give them an option to host their own email server, and even have Nextcloud if they want. Lets say a friend wants me to host his website and email, and he already owns the domain name. I simply login to his DNS provider and configure the appropriate A and MX records to point to my server. I then login to the Hestia Control Panel, and add their domain, lets say “example.com”. I can then upload his website via the Control Panel, then the site is live. I can also configure the email server, and email accounts, and even setup his own Nextcloud, all from the control panel. In this situation, he would be able to access his website “www.example.com”, and his email “webmail.example.com”, and Nextcloud “cloud.example.com” from anywhere. Another awesome thing is I can have every site secured by a free Lets Encrypt SSL certificate, with a simple click of a button from the control panel. I can also even run several email servers, websites, and Nextcloud instances for each family member, all from the same server.
In the below steps, we’ll go through configuring your domain DNS to point to your webserver , forwarding the necessary ports in your firewall, setting up a Linux server, installing Hestia Control Panel, uploading your website, configuring your email server and accounts, and setting up Nextcloud.
Setup DNS by logging into your DNS provider, and adding the below records as required
- Create new “A Record” for “hcp” and point to your servers public IP address
- Create new “A Record” for “mail” and point to your servers public IP address
- Create new “A Record” for “webmail” and point to your servers public IP address
- Create new “MX Record” “@”, “mail.yourdomain.com”, “Priority 10”
Configure your router to forward the following ports to your server
- Port 8083 – Hestia Web Interface
- Port 80, 443 – Websites
- Port 143, 993, 110, 995, 25, 465, 587 – Email
Setup is straight forward. Follow the below steps to get Hestia Control Panel up and running
1) Start by installing one of the Linux server options mentioned above
2) Install updates by running the below command.
Sudo apt update && sudo apt upgrade
3) Reboot the system when complete.
4) Login once the system reboots.
5) Download Hestia Control Panel.
Sudo su -
wget https://raw.githubusercontent.com/hestiacp/hestiacp/release/install/hst-install.sh
6) Modify and run the below script to install and configure Hestia Control Panel.
bash hst-install.sh --interactive no --email youremail.com --password yourpassword --hostname hcp.yourdomain.com -f
Reboot
Login to Hestia Control Panel
- https://yourpublicipaddress:8083
- or
- hcp.yourdomain.com:8083
If your credentials you entered into the install script don’t work, when reset the password with the below command, from the linux command line. I ran into this issue once, and it might have something to do with the complexity of the password I set.
- sudo su -
- v-change-user-password admin newpassword
Setup Hestia
1) Create new user account, as everything going forward should be done from that new user, and not the admin account.
2) Switch to newly created user account.
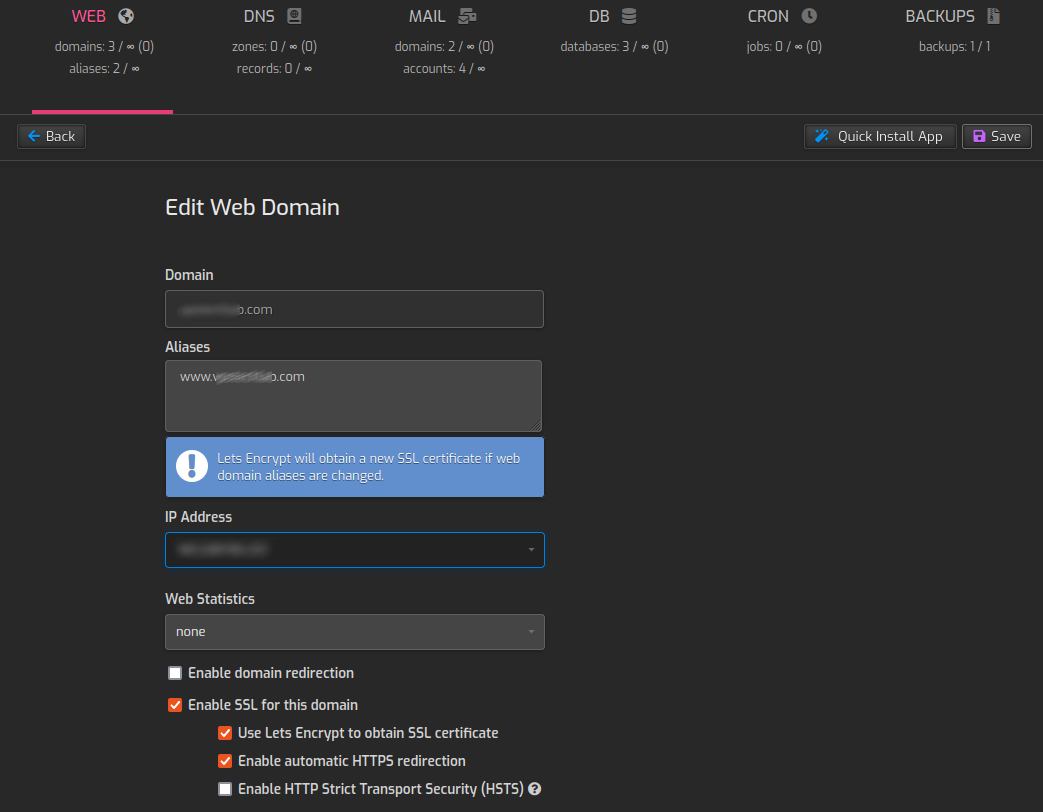
3) Setup web domains and subdomains, by clicking "Add Web Domain". No need to add HCP, mail, or webmail, as those are added automatically.
- Domain: yourdomain.com
- Aliases: www.yourdomain.com
- Enable HTTPS redirection, and SSL for this domain if required. May take a minute to apply settings as Hestia will request and setup the free Lets Encrypt SSL certificate. If it fails, ensure your DNS has already propagated, and that your ports are properly forwarded in your firewall.
In my situation I setup “mydomain.com”, and “cloud.mydomain.com”.
Domain Setup “Enable SSL, Let’s Encrypt, and HTTPS redirection”.
Subdomain Setup “Enable SSL, Let’s Encrypt, HTTPS redirection, and HSTS”.

Upload Websites
I won’t be covering WordPress in this article, however if you are using an HTML website, it is simple to upload at this point. From within Hestia, click Files on the top menu.
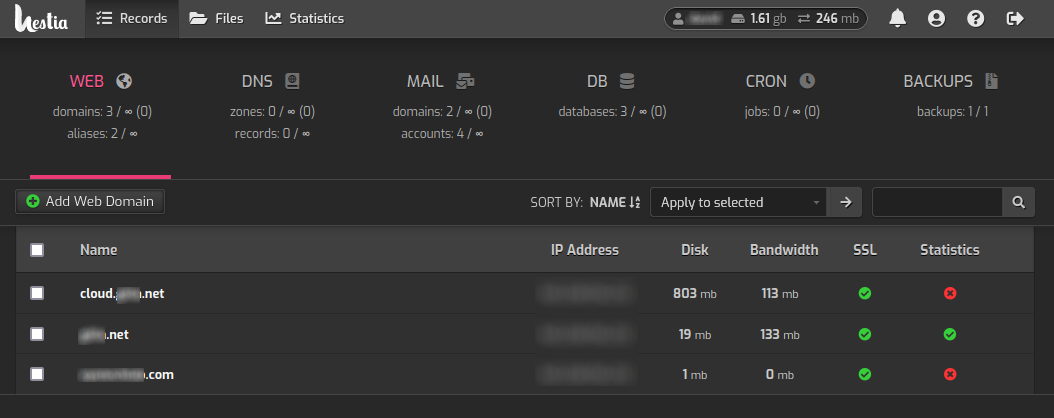
From within the file manager, select the “Web” folder, then the specific domain you want to upload the website, then the “Public_html” folder. You will see an index.html file, which is a simple under construction page, which can be deleted, and replaced with your index.html file. Create any folders you need by selecting “New”, then “Folder”. Then select “Add files” then upload your website content to the appropriate folders. Your site should now be live!
Setup Email Server
You can setup an email server for each and every domain name if you wish. You can setup free unlimited email accounts for each domain you have in Hestia. Once you follow the simple setup, you’ll be running your own email server, which you can access from anywhere. You’ll have the option to add your email to your favourite email program, and you’ll also have a webmail option you can access your email by browsing to “webmail.yourdomain.com”.
To setup email for a specific domain in Hestia, follow the steps below.
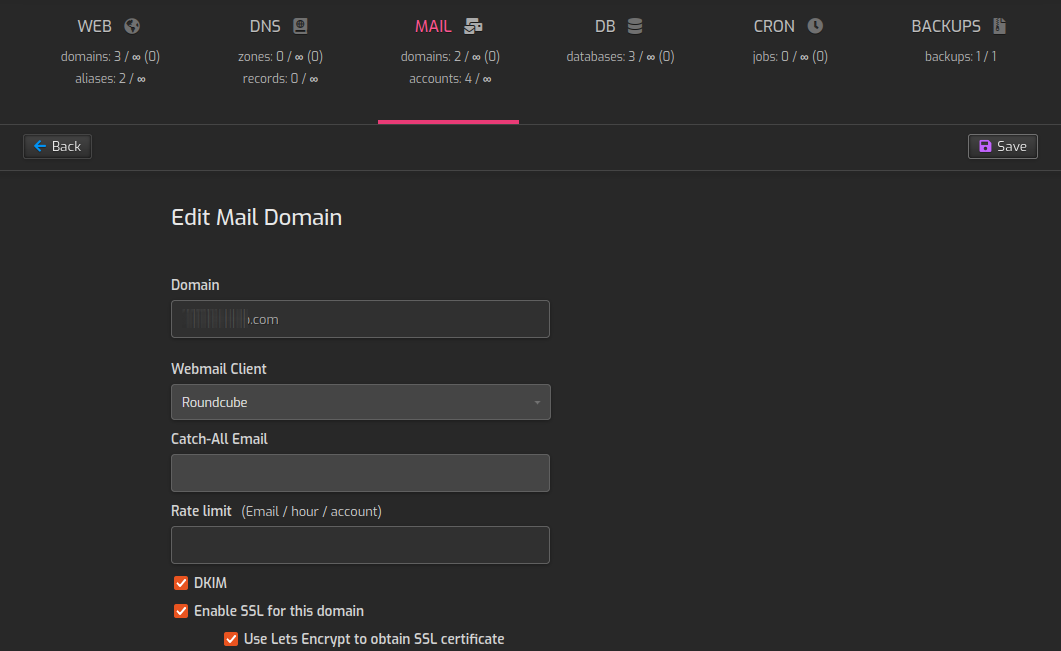
- From within Hestia, click “Mail” on the top menu, and click “Add Mail Domain”
- Fill in the required info as per the screenshot below
- You will require an SMTP relay so you can send email. I use a free account from Sendinblue for my SMTP relay, and it works well. Signup at “https://www.sendinblue.com/”.

Add DKIM and SSL for Email Domain
From within Hestia, click “Mail” on the top menu, and click the pencil button for the email domain.
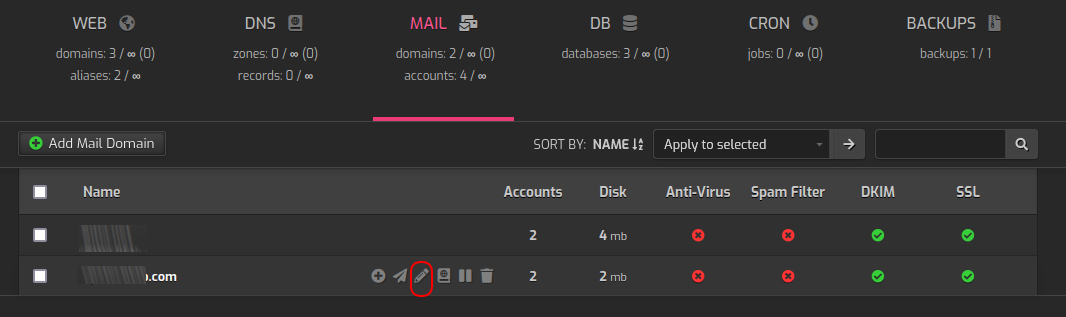
Select the options for "DKIM", "Enable SSL for this domain", and "Use Lets Encrypt to obtain SSL certificate", then click Save.
Add Email Account
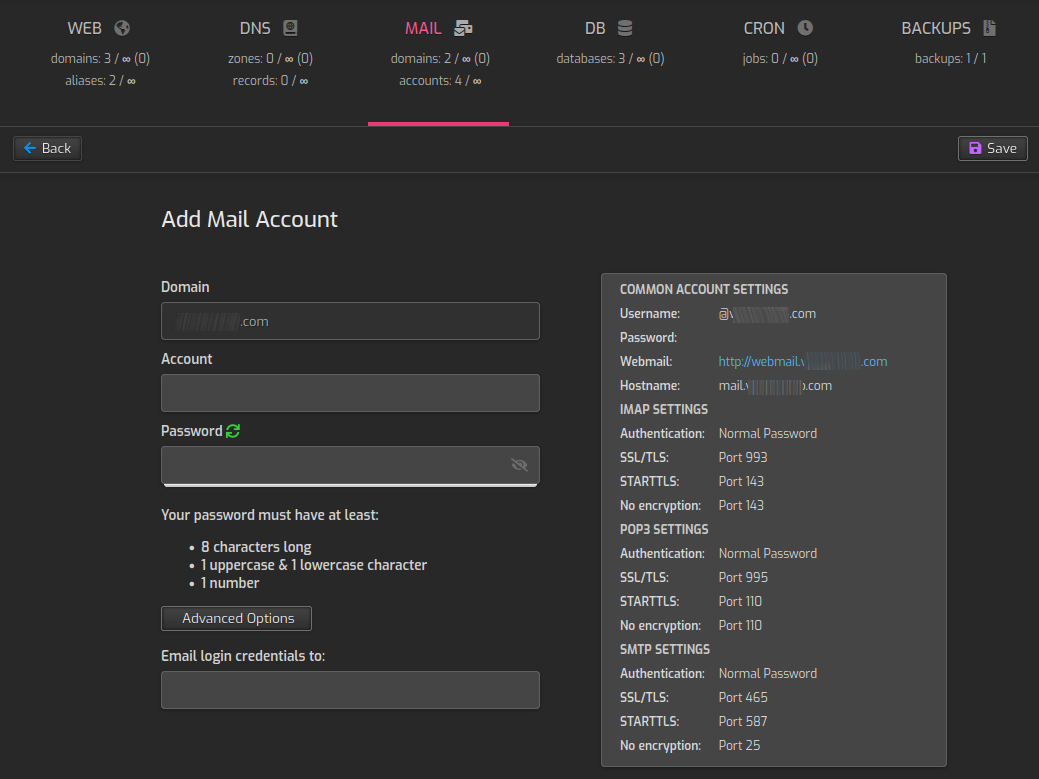
Adding an email account is simple. From the Mail tab in Hestia, select the email domain you setup, and click Add Mail Account.
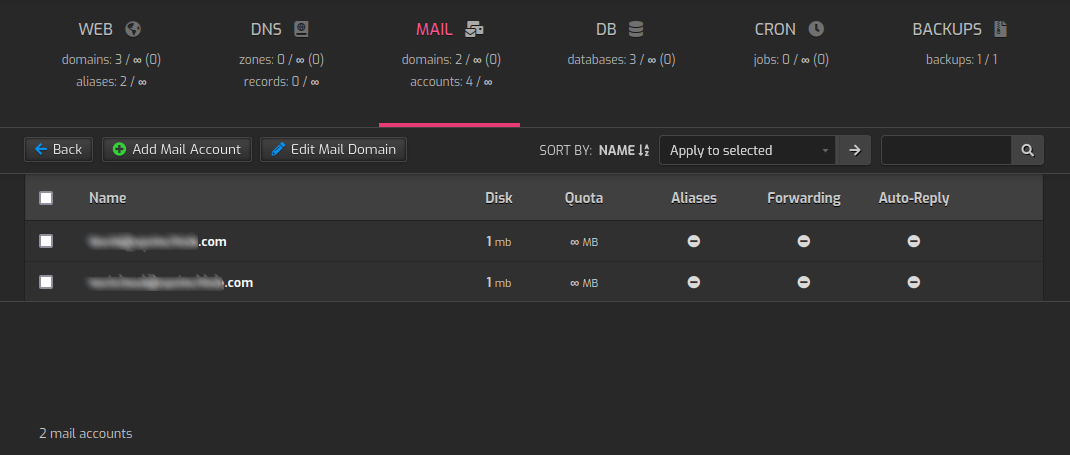
Fill in the required data to create the email account. Create as many as you’d like! Take note of the provided info when creating the email account, as the user of the mailbox can access it from either the webmail site, or by their favourite email program using the IMAP and SMTP info.
Setup Nextcloud
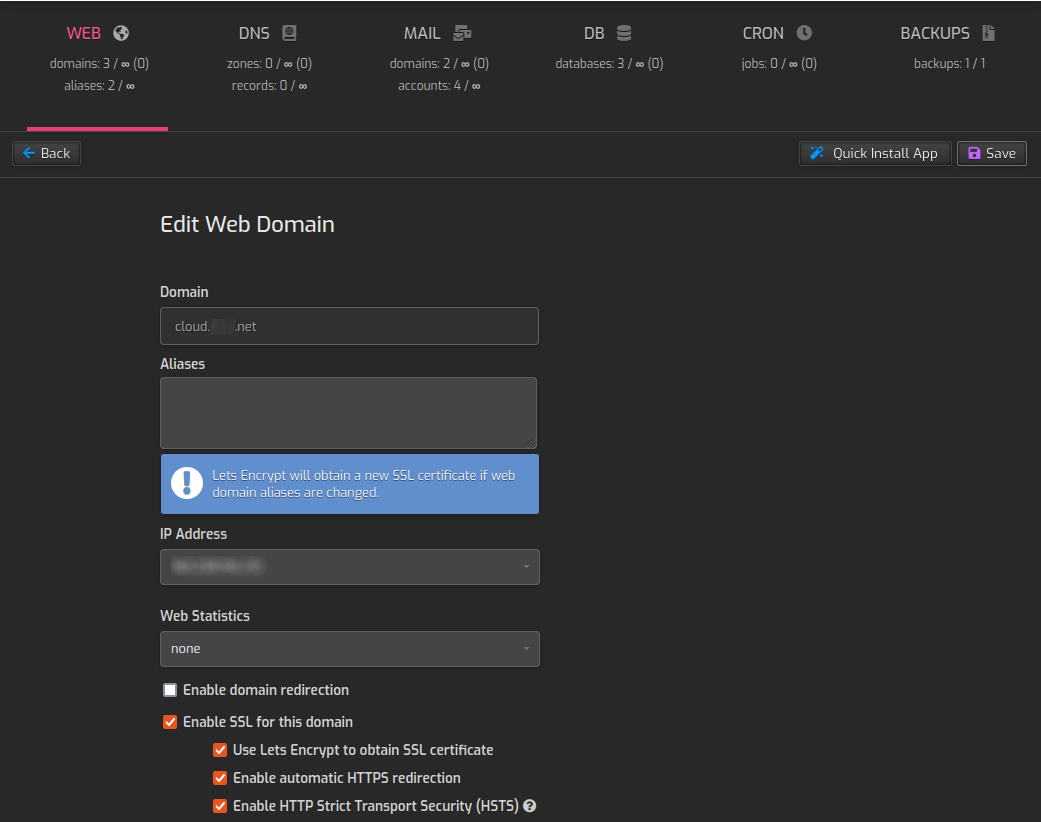
If you’d like to use Nextcloud, Hestia makes it easy to set everything up with a few easy clicks. If you haven’t done so already, add the subdomain of your choosing for your domain you want to use for Nextcloud. For example, I used “cloud.mydomain.net”.

Now click on the subdomain you just created, and fill in the appropriate info. Make sure to select the 4 bottom options for SSL, Lets Encrypt, HTTPS, and HSTS. Then select Save.
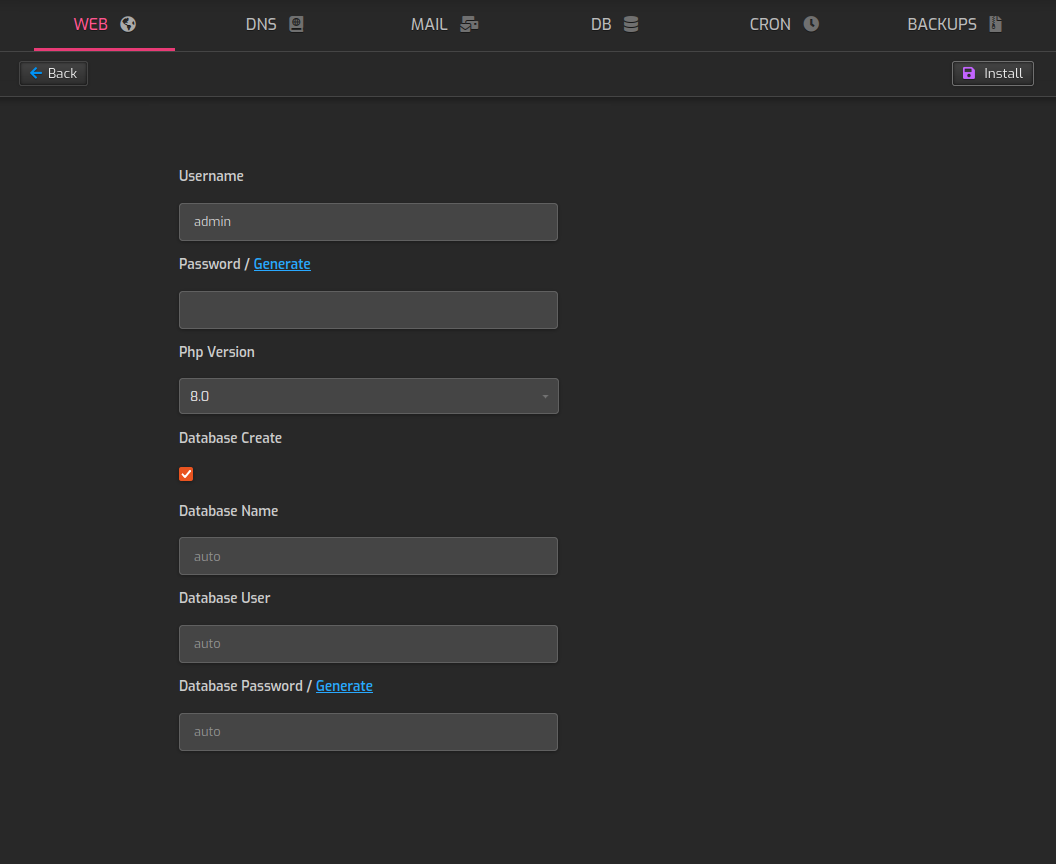
Next, click the Quick Install App option, and select the setup button for Nextcloud.
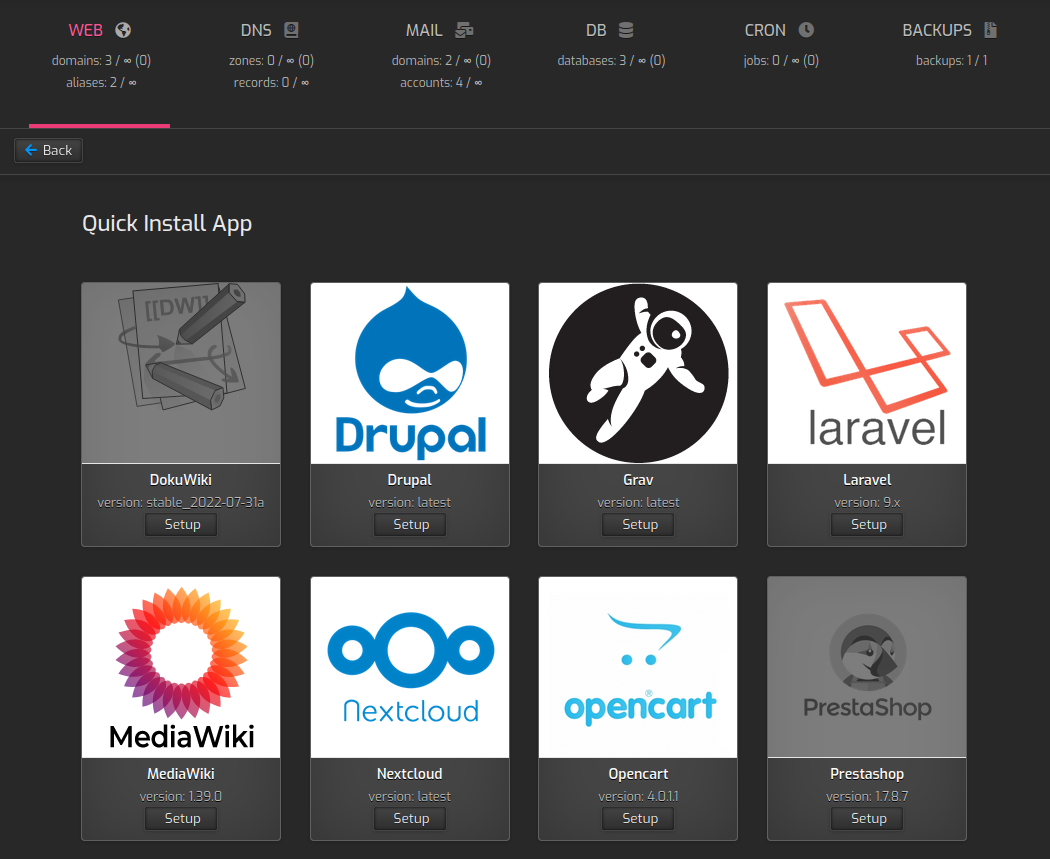
Fill out the required details, and record your passwords, then click install. Once complete, web browse to cloud.yourdomain.com, to access Nextcloud.
That sums up everything I wanted to go through, but keep in mind Hestia has several other functions and apps, so have fun checking them all out!